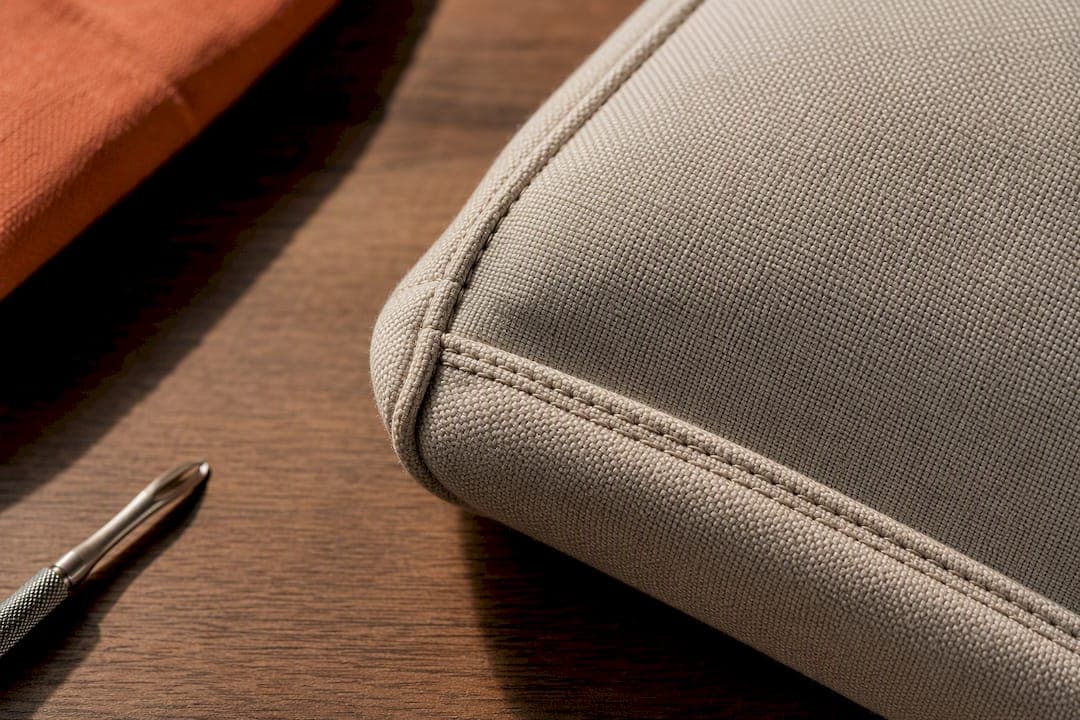
Reinforced seams are the single detail that decides whether a cushion lasts three years or ten. Continuous piping, double-line stitching, and bonded polyester thread are the techniques that matter most. If you're shopping, check for uninterrupted piping and doubled seams before you check the fabric pattern; if you're repairing, plan to add piping or tape-edge binding at the stress points that failed first.
TL;DR:
- Reinforced seams, especially continuous piping and doubled stitching, significantly extend cushion lifespan by distributing stress at stress points and preventing blowout.
- Choosing bonded polyester or nylon thread and synthetic piping cord for outdoor cushions is crucial for resisting UV, water, and mildew damage that can cause early seam failure.
- Inspect cushions before purchase by verifying continuous piping, reinforced corners, stitch count, and seam allowance, as these details predict durability far better than price alone.
- Repairing at home by adding piping or double stitching at stress points can almost always prolong a cushion's life more cost-effectively than replacing it.
- Cushions built with reinforced construction from the start, including bonded threads and full perimeter piping, offer better long-term value, especially under frequent or outdoor use.
Table of Contents
- Why Reinforced Seams Matter for Cushion Durability
- Piping, Double-Line, Zigzag, or Tape-Edge: Which Reinforcement Wins?
- What Thread, Cord, and Fabric Actually Hold Up
- How Do You Inspect a Cushion Before You Buy It?
- How to Reinforce or Repair a Cushion Seam at Home
- The Construction Details Behind Createdecorus Cushions
- Why We Choose Piping and Reinforced Corners, Even When It Costs More
- Shop Cushions Built With Reinforcement in Mind
- Sources
Why Reinforced Seams Matter for Cushion Durability
Every cushion seam does one job: it holds two pieces of fabric together while filling pushes outward and hands, elbows, and pets push in. A seam that isn't reinforced concentrates all that stress on a single line of thread. Eventually the thread frays, a stitch pops, and what upholsterers call "seam blowout" begins, usually at a corner or where two panels meet.
Corners and panel joins fail first because they carry the sharpest changes in direction. A straight run of stitching along a flat edge distributes tension evenly. The moment that seam turns a 90-degree corner, the fabric wants to pull in two directions at once, and a single line of stitching has no backup if one thread gives way.
That's the practical reason piping functions as structural reinforcement: it creates a triple-layer seam that spreads mechanical stress across more material instead of letting it concentrate on one thread line. A well-built seam does more than keep the cover from splitting. It keeps loose fill contained, preserves the cushion's shape after repeated compression, and protects the crisp edge that makes a cushion look intentional rather than tired.
What separates a seam built to last from one that isn't usually comes down to a short list of construction choices:
- Continuous piping along every load-bearing edge, not just the front
- Reinforced stitching or remallado at corners, where stress concentrates
- Bonded thread rather than standard thread, which resists abrasion and UV breakdown
- A seam allowance wide enough to hold stitches without fraying at the edge
Rotating and flipping cushions regularly, and kneading the filling from edges to center, also keeps wear from concentrating on one seam. Construction sets the ceiling on durability, but how you use the cushion decides how close you get to it.
Piping, Double-Line, Zigzag, or Tape-Edge: Which Reinforcement Wins?
Not every cushion needs the same reinforcement, and picking the wrong one either wastes money or leaves a weak point exactly where you didn't expect it.
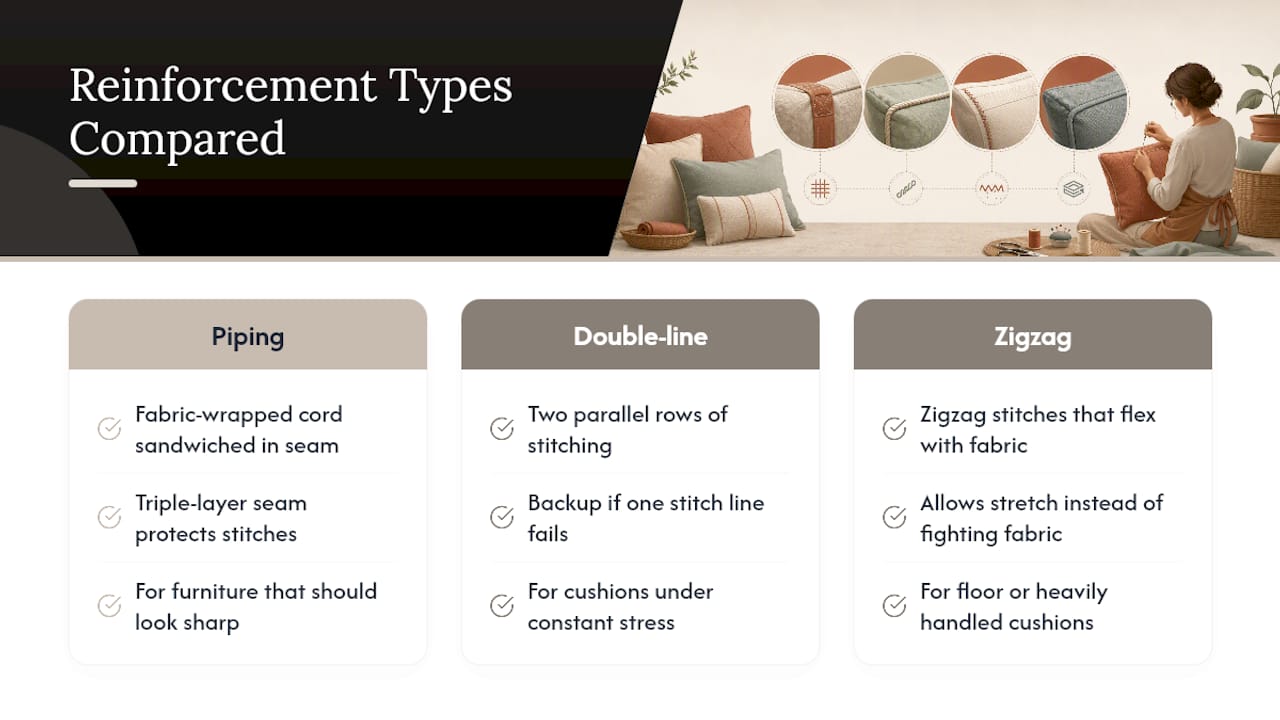
Piping (welting) is the gold standard for edge durability. The technique sandwiches a fabric-wrapped cord between the front and back panels, so the seam gains a third layer of material acting as a cushion for the stitches themselves. This "sandwich" method, placing piping right side up on the main panel before layering the second panel face down, creates a true triple-layer seam that behaves like a protective gasket for the internal stitching. It's also the reinforcement that holds a crisp edge line even after months of daily use, which is why it shows up on furniture meant to look sharp for years, not seasons.
Double-line and zigzag stitching trade a bit of that polish for flexibility. Zigzag stitching flexes with the fabric instead of fighting it, which makes it the better call for cushions that get folded, thrown, or compressed hard and often, think floor cushions or cushions in a household with kids. Double-line stitching, two parallel rows instead of one, adds a built-in backup: if one line fails, the second still holds.
Tape-edge binding and remallado approach the problem from the outside in. Instead of reinforcing the seam itself, this method encases the raw fabric edge in a binding strip that takes the abrasion before it ever reaches the thread. On metal or wood furniture frames, where an unprotected seam rubs against a hard surface every time someone sits down, that external guard can roughly double seam lifespan compared with a plain serged edge.
As a rule of thumb: choose piping for anything you want to look finished and last for years, double-line or zigzag for cushions under constant physical stress, and tape-edge binding for anything resting against a hard frame or living outdoors.
Pro Tip: If you're unsure which technique your cushion needs, flip it over and check the back seam first. Manufacturers who cut corners on reinforcement almost always start by skipping it where buyers won't look.
What Thread, Cord, and Fabric Actually Hold Up
Technique only works as well as the materials behind it. A perfectly executed seam sewn with the wrong thread will still fail early, and outdoor cushions expose that mismatch faster than anything indoors.
Thread: bonded polyester or nylon thread outperforms standard cotton or all-purpose thread on every count that matters for cushions: tensile strength, resistance to UV breakdown, and resistance to the friction that happens every time someone sits down.
Piping cord: cotton piping cord has no place in an outdoor cushion. Synthetic cords, polyester or polyolefin, resist the moisture and mildew that eventually rot a natural-fiber core from the inside, long before the outer fabric shows any wear. Cord diameter matters too; a common outdoor standard runs around 5/32 inch, sized to match the fabric weight rather than left to guesswork.
Fabric: for outdoor pieces, solution-dyed acrylic or performance polyester resists fading and won't wick water into the fill the way natural fibers do. For indoor cushions, a dense cotton or linen blend gives the seam something substantial to grip, which matters more than most buyers realize; thin, loosely woven fabric tears at the stitch line no matter how good the reinforcement is.
Zippers: the closure is a seam too, and it's often the first thing to fail. Look for corrosion-resistant teeth, a lock slider, and bar-tacked ends, the small reinforcing stitches at each end of the zipper track that keep it from splitting the seam open under pressure.
- Bonded polyester or nylon thread for strength and weather resistance
- Polyester or polyolefin piping cord, never cotton, for outdoor use
- Solution-dyed acrylic or performance polyester for sun and moisture exposure
- Corrosion-resistant, bar-tacked zippers at closure points
How Do You Inspect a Cushion Before You Buy It?
Price alone tells you almost nothing about how long a cushion will last. The construction does, and you can check most of it in under a minute with the cushion in your hands.
- Measure the seam allowance. A well-made cover typically runs about 1.25 centimeters, enough fabric beyond the stitch line to resist fraying without adding bulk.
- Follow the piping around every edge. Continuous piping that wraps the whole perimeter without breaks signals real construction. Piping that stops short at the back seam is a shortcut.
- Check the corners specifically. Look for a visible reinforcement stitch or remallado finish where panels meet at an angle; this is the spot that fails first on a poorly made cushion.
- Count the stitch lines. A single row of stitching along a load-bearing seam is a warning sign on anything marketed for daily or outdoor use.
- Read the product specs for thread and zipper grade, and ask directly about warranty or repair policy if it isn't listed. A brand confident in its construction will usually say so.
Weigh all of that against price. A cushion that costs 20% more but carries continuous piping, doubled corner stitching, and a bar-tacked zipper will often outlast two or three cheaper replacements, which makes it the better value even before you factor in the hassle of replacing a blown seam mid-season.
How to Reinforce or Repair a Cushion Seam at Home
You don't need an upholstery shop to add real reinforcement to a cushion you already own. You need the right supplies and a little patience.
Supplies: a heavy-duty hand or machine needle, bonded polyester thread, piping cord sized to your fabric weight, upholstery tape, a heavy-duty zipper if you're replacing one, and a welting foot if you're sewing piping on a machine.
- Open the seam. Remove the cover or carefully unpick the section that's failing so you can access the raw seam from the inside.
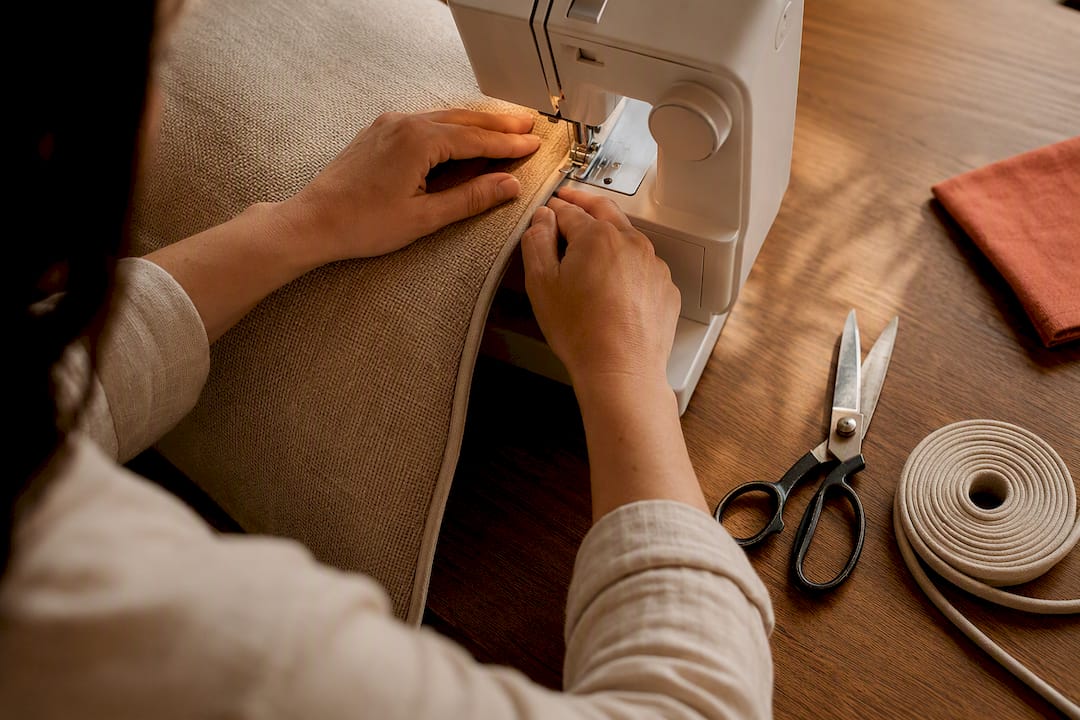
- Sandwich the piping. Lay the piping cord along the fabric's right side, then fold the second panel face down over it. Stitch through all three layers using a welting foot to keep the cord tight against the seam line.
- Double-stitch stress points. Run a second line of stitching about a quarter inch inside the first at corners and any spot that showed early wear.
- Add tape-edge binding. For raw edges that will rub against a frame, fold binding tape over the seam and stitch it down to shield the thread from direct contact.
For smaller repairs, a whip-stitch closes a small opening fast, and a few bar tacks at the corners will outlast a simple straight stitch. If the foam or fiber fill inside has broken down along with the seam, or the frame itself needs work, that's the point to call a professional upholsterer rather than push a home repair further. Kneading fill back toward the center of the cushion after any repair also helps redistribute weight away from the seam you just fixed.
Pro Tip: Adding piping to an existing cushion takes real time and does increase the labor involved, but it's almost always worth it on a cushion you'd otherwise replace. You're trading an afternoon of work for years of extra life.
For technical seam allowance guidance beyond what's covered here, The Perfect Stitch offers professional soft-furnishing reinforcement techniques worth reviewing before a larger repair project.
The Construction Details Behind Createdecorus Cushions
We build every cushion around the same principle: the seam is structural, not decorative. Continuous piping runs the full perimeter of each cover, never breaking or shortcutting at the back where buyers rarely check. Corners get a reinforced remate, a deliberate finishing stitch that keeps the direction change from becoming the first point of failure.
Bonded thread finishes every seam, chosen specifically for its resistance to the abrasion that comes from daily use. Our blog post on what defines luxury throw pillows goes deeper into how visible stitch geometry signals workshop-level attention, not just a design flourish. That precision matters most in exactly the spots most cushions cut corners: the seam you don't see until it's already failing.
- Continuous piping along every load-bearing edge
- Reinforced corner remates at every panel join
- Bonded-thread finishing for abrasion and UV resistance
- Trade program access for designers who need construction consistency at scale
Why We Choose Piping and Reinforced Corners, Even When It Costs More
Piping and doubled corner stitching add labor. There's no getting around that, and it's tempting to see it as a cost you can trim without the customer noticing. We don't see it that way, because the customer notices eventually, usually the day a seam gives out on a cheaper cushion two seasons in.
The real trade-off isn't cost versus quality. It's aesthetics versus longevity, and the honest answer depends on how the cushion will actually live in your home. A decorative accent pillow rarely touched can get away with lighter construction. A cushion on a daily-use chair or an outdoor lounger cannot. We'd rather you choose reinforced construction on purpose, understanding what it buys you, than discover the difference the hard way.
Craft, done right, is a form of repairability. A well-built seam can be mended for years; a blown seam on cheap construction usually means the whole cushion gets replaced.
— Ernesto
Shop Cushions Built With Reinforcement in Mind
Createdecorus is the direct alternative to buying a cushion you'll need to repair within a year. Every piece in our collection carries the construction details covered here as standard, not upcharge: continuous piping around the full perimeter, bonded-thread seams, reinforced corner remates, and premium zippers with corrosion-resistant hardware. You're not paying extra for reinforcement; it's built in from the first stitch.

Homeowners and interior designers alike can browse the full retail collection to see these construction details in handcrafted pieces made in Mexico. If you're sourcing for a boutique or design practice, our trade program offers wholesale pricing and consistent construction across bulk orders. Start with the shop collection, or apply for trade access if you're buying for clients.
Sources
For deeper technical detail on the techniques covered here, review the piping and reinforcement guidance from Tapicero, the outdoor cushion piping methods at RapidRepair.blog, stitch comparisons from Tejidos Mecomadrid, and construction standards from Ensinaja. Our own posts on luxury throw pillow construction and seasonal cushion storage expand on the craftsmanship notes above.